Smart Home Upgrades for Summer – Simple Home Tech Improvements
The first day of summer is a great reminder to think beyond outdoor projects. As the heat rises and energy usage increases, smart home upgrades offer a reliable way to stay cool, comfortable, and efficient.
A smart thermostat is one of the most effective updates you can make. These devices learn your habits and adjust temperatures automatically, helping you save on energy without sacrificing comfort. Many models can be controlled from your phone, making it easy to manage your home’s climate from anywhere.
Smart lighting is another upgrade worth considering. Inside your home, it allows you to schedule lights or adjust brightness throughout the day. Outside, it adds safety and ambiance to patios, walkways, and entry areas—ideal for warm evenings spent outdoors.
Summer also brings an increased focus on home security. Smart locks and video doorbells help you keep tabs on who’s coming and going. Whether you’re away for the weekend or just out in the backyard, you can check in and stay in control from your phone.
If energy efficiency is your goal, smart window shades offer a low-effort way to keep your home cooler. These shades adjust automatically based on sunlight, reducing the need for air conditioning and improving indoor comfort. Check out our partner Urbane Country LLC. for custom window shades and more!
Smart irrigation systems are perfect for maintaining a healthy lawn or garden without overwatering. They adjust based on weather and soil conditions, helping you conserve water and avoid waste during the hottest months.
For those already planning a remodel, summer is the ideal time to include smart features. Integrating them during renovation makes installation easier and more efficient. At Enrich Construction and Remodeling, we help homeowners bring comfort, technology, and energy savings together. Reach out today to explore smart solutions for your home this summer. Expert advise you can trust!
Your deck is more than just an outdoor structure—it’s where memories are made. Whether you’re hosting backyard barbecues or enjoying quiet mornings with a cup of coffee, your deck plays a major role in your home life. But how do you know when your deck needs more than just a quick fix?
At Enrich Construction and Remodeling, we believe in helping homeowners make smart, safe decisions about their spaces. Here are the top 5 signs that it might be time to replace your deck entirely, rather than invest in short-term repairs.
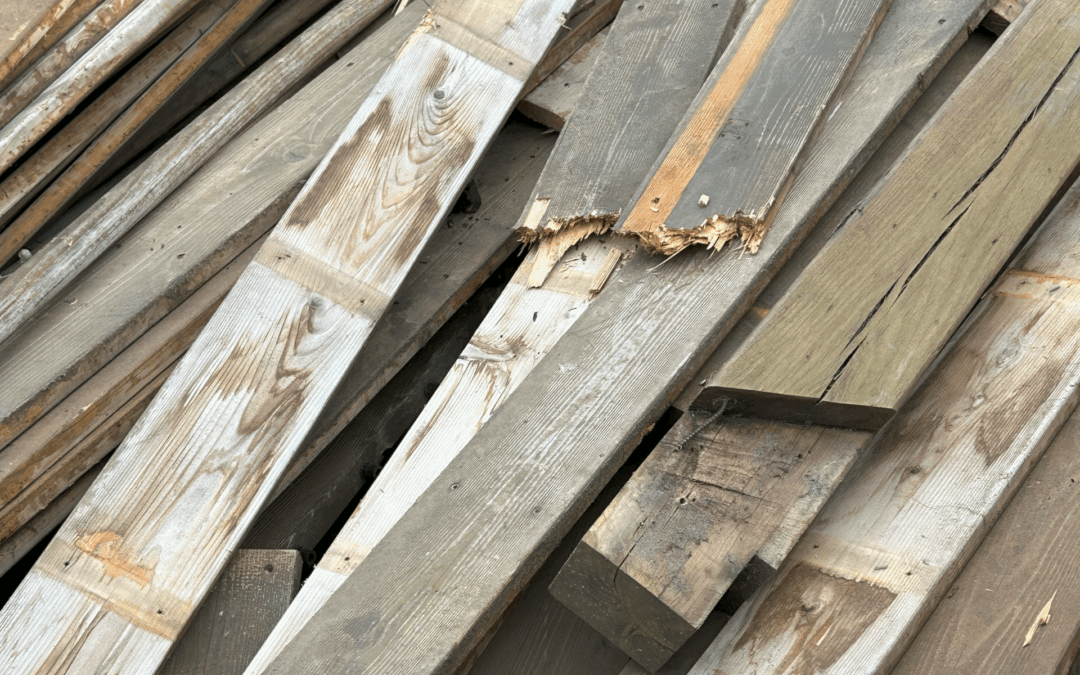
1. Rotting or Soft Wood
Wood rot is one of the clearest indicators that your deck may need a full replacement. If you notice soft spots, splintered boards, or areas that crumble under light pressure, that could be a sign of underlying structural issues.
Rot spreads quickly and can affect the frame and support beams—areas that are critical to your deck’s safety. Minor surface rot can sometimes be patched, but if it’s widespread, replacing the entire deck is usually the best course of action.
2. Wobbly or Unstable Structure
Does your deck sway when you walk across it? Are the railings loose or shaky? These are not just inconveniences—they’re major safety hazards.
A stable deck should feel solid underfoot. Movement in the frame or support posts may indicate deterioration at the joints or foundational problems. If tightening bolts or reinforcing posts doesn’t solve the issue, it may be time for a full rebuild.
3. Water Damage and Mold Growth
Exposure to the elements can take a heavy toll on decks. Signs of water damage include discoloration, mildew, green algae patches, and even rusted nails or hardware.
Consistent moisture leads to wood decay and mold, both of which compromise the deck’s integrity. If water damage is widespread, especially in the foundational areas, replacement may be the safest and most cost-effective option.
4. Ledger Board Pulling Away from the House
The ledger board is the component that connects your deck to your home. If it’s pulling away or sagging, this could signal a serious structural issue.
When the ledger becomes loose, the deck can detach from the house—a situation that poses a serious safety risk. Fixing this often requires replacing or rebuilding the ledger system entirely, making a full replacement a smarter long-term investment.
5. Your Deck is Over 15 Years Old
Even with excellent maintenance, most decks have a lifespan of about 15 to 20 years. Beyond that, materials degrade, fasteners corrode, and your deck might not meet current building codes.
An older deck is more likely to suffer from hidden damage and structural weaknesses. In many cases, replacing it not only improves safety but also boosts your home’s value and curb appeal.
Don’t Wait Until It’s Too Late
Minor issues can mask bigger structural problems. That’s why it’s crucial to schedule a professional evaluation if you’re noticing any of these signs.
At Enrich Construction and Remodeling, we offer comprehensive deck assessments to help you make informed decisions. Let’s transform your aging or unsafe deck into a beautiful, durable space built to last.
Consider Hiring Professionals
Ready to take the next step? Contact us today for a free consultation.
Deck repairs or remodeling is a significant investment that can enhance the beauty and functionality of your outdoor space. By entrusting the professionals at Enrich Construction, you can be confident that every detail—from structural integrity to design—will be handled with care and precision. Whether you’re looking to restore an aging deck or reimagine your backyard retreat, we’re here to help. Contact us today to bring your dream deck to life!
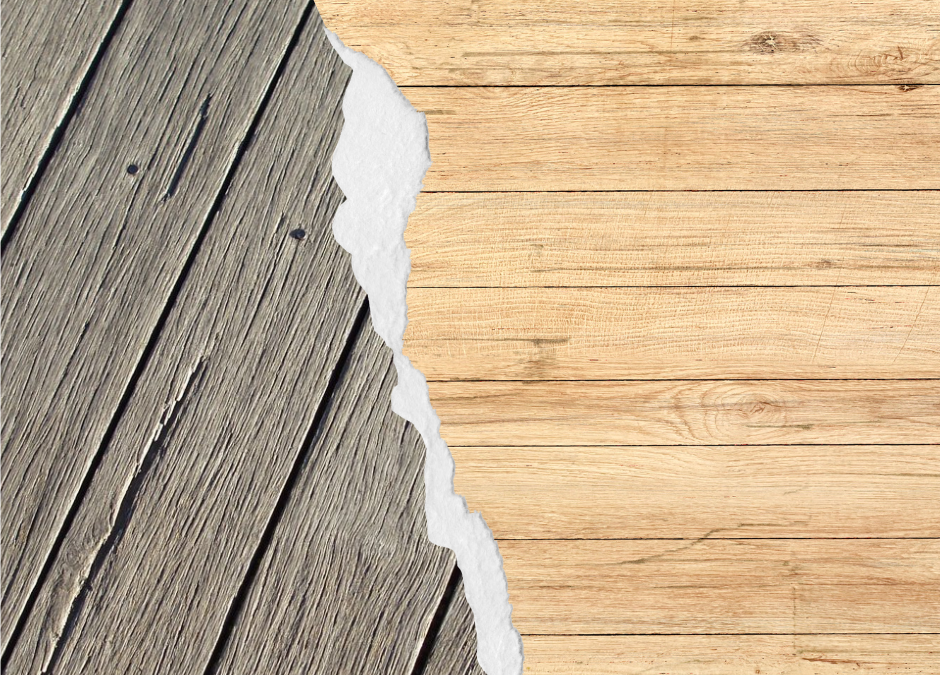
Spring is right around the corner, and that means more time spent outdoors enjoying your backyard. But before you fire up the grill and invite friends over, take a good look at your deck or patio. Is it in top shape, or is it showing signs of wear and tear from years of weather exposure? If your outdoor space is looking a little worse for wear, now is the perfect time to invest in deck restoration or consider a brand-new build.
Why Spring is the Best Time for Deck Restoration or a New Deck
As temperatures rise, so does the demand for outdoor living spaces. Getting ahead of the rush by starting your project now ensures you can enjoy your deck or patio all season long. Here are a few key reasons why spring is the best time to take action:
Beat the Busy Season: Contractors fill up quickly once warm weather arrives. Scheduling your deck restoration or new build now means faster service and completion.
Ideal Weather Conditions: Spring offers moderate temperatures that are perfect for construction and staining, allowing materials to set properly and ensuring a high-quality finish.
Prevent Further Damage: Winter weather can take a toll on wood decks, causing cracks, warping, and rot. Addressing these issues early prevents them from worsening and saves you money in the long run.
Signs Your Deck Needs Restoration
If your deck is structurally sound but looks worn, restoration can bring it back to life. Here are some signs that your deck needs attention:
Faded or Peeling Stain/Paint – Sun exposure can cause the finish to deteriorate, leaving your deck vulnerable to moisture damage.
Splintering or Cracked Boards – Damaged boards not only look bad but can be a safety hazard.
Loose or Rusty Fasteners – Check for nails and screws that are coming loose, which can affect the stability of your deck.
Mold or Mildew Growth – Excess moisture can lead to dangerous mold buildup, which needs to be addressed before it spreads.
If your deck has multiple structural issues, it may be time for a complete rebuild.
The Benefits of a New Deck or Patio
If your current deck is beyond repair or if you want to enhance your outdoor space, a new deck or patio is a fantastic investment. Here’s why:
Boosts Home Value – A well-designed deck increases your property’s value and curb appeal.
Expands Your Living Space – Create an outdoor oasis for dining, entertaining, and relaxing.
Customizable to Your Style – Choose from a variety of materials, layouts, and features to fit your lifestyle.
Low-Maintenance Options Available – Composite decking and stone patios require minimal upkeep while providing long-lasting beauty.
Ready to Transform Your Outdoor Space?
At ENRICH Construction, we specialize in deck restoration and new builds, helping homeowners create beautiful, functional outdoor spaces. Whether you need a simple refresh or a completely new patio, our team is ready to bring your vision to life.
Don’t wait until summer to start your project—contact us today for a consultation and get your outdoor space ready for spring!
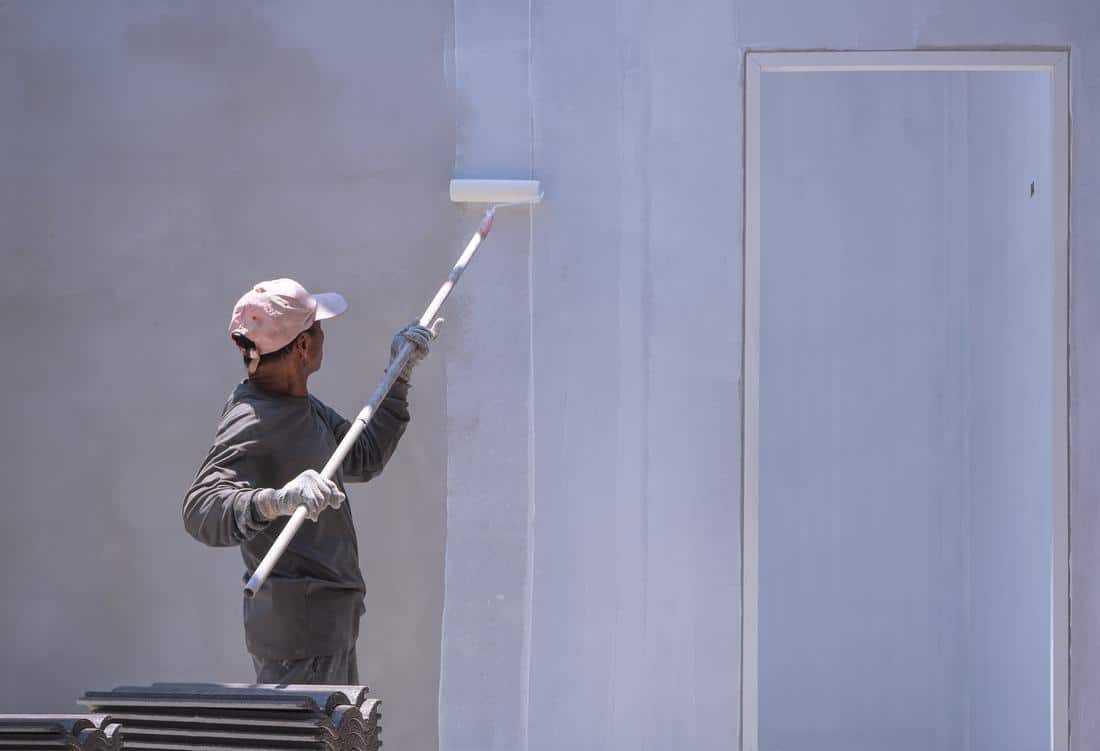
Prepping your home for exterior paint is fairly easy with the following tips.
If you want to work on your painting project on weekends, remember that the best outside paint job takes three weekends of ideal weather. Allow for the possibility of unexpected rain or humidity. To be safe, schedule your job for a month during the dry season when temperatures range from 50 to 80 degrees Fahrenheit.
If you paint in severe weather, your uncured paint coat may blister. If your house has multiple stories, you’ll also need a sturdy ladder or a scaffold.
Contaminants must be removed.
Even though lead paint has been illegal since 1978, many homes still have it on their walls. If you suspect lead contamination, don’t try to scrape or sand it, and avoid washing. Before you begin, you must have a qualified contractor in lead abatement remove the paint. Then, before you begin any more outside painting preparation, test the paint.
Mold or mildew is a frequent pollutant, especially in humid locations. Look for black, green, or brown stains with a fuzzy texture. If you’re unsure if a stain is caused by mold, mildew, or dirt, use regular bleach to remove it. You’ve just destroyed some mold or mildew if it bleaches away.
To eradicate mold and mildew, use bleach or another EPA-registered micro biocide or fungicide. While bleach alone can be effective in a 3:1 solution with water, more effective, highly concentrated solutions are available. In addition, look for cleansers and degreasers that can remove mold and mildew and dirt, grease, and oil.
If you’re painting a property in an area where mold and mildew are likely ongoing issues, add a mildewcide (chemical mixture) to the paint to prevent future contamination problems.
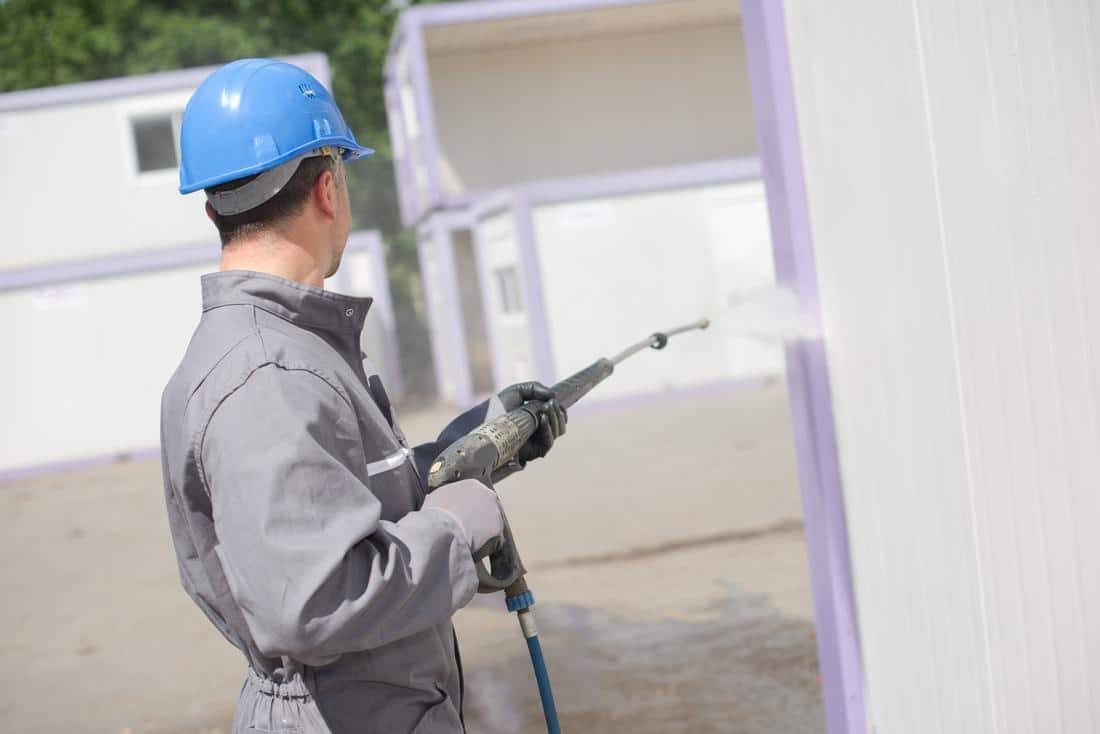
Clean All Sides of the House
Get the outside surfaces of the house as clean as possible before painting to help the new paint adhere. If the home has already been painted, you may expedite this step by power cleaning the whole structure. Pressure washing is another option for stained walls. However, depending on the condition of the wood, you may want to employ gentler methods.
Power washing should be avoided if the house has soft wood siding since it might harm the wood. Instead, softwoods, such as redwood or cedar, must be cleaned by hand with soap and water, especially if they are older and damaged.
It’s simple to spray down a home’s exterior and assume it’s clean enough, but if you do, you’ll probably regret it later since the paint may not apply to the older surface. On the other hand, every minute spent carefully cleaning the property is an investment in a quality paint job and a happy customer at the end of the day.
Remove any peeling paint.
Scrutinize the home for damage and flaking paint. Filling holes, caulking surfaces, and removing loose paint may be necessary. Remove badly adhering paint with care, scraping it away by hand. Another alternative is to scrape it away with a firm metal wire brush or a power sander with a paint-stripping attachment. As you scrape, work along the grain of the wood. When working with wood shakes, remember that steel wire bits might become trapped in the soft wood. Take out all of these pieces by hand. They can ruin your paint job and produce discoloration in the wood if you don’t. When dealing with peeling paint, use a dust mask, a respirator, work gloves, and eye protection.
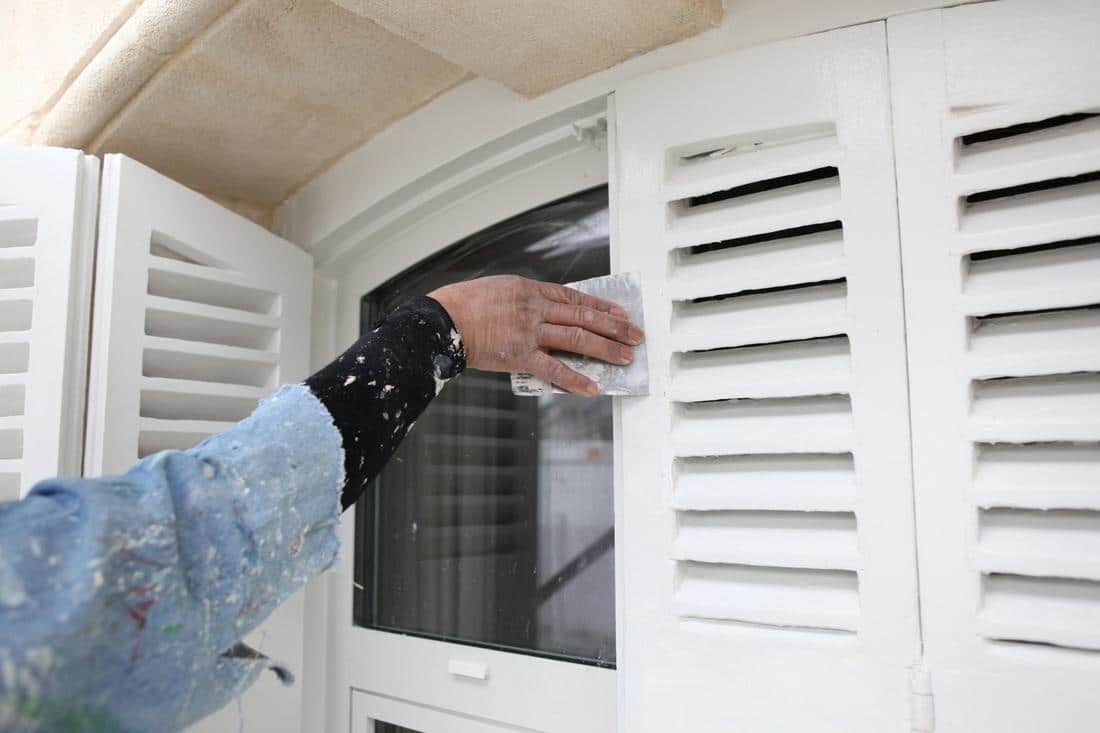
Sand the Outside Walls
Sanding the outside walls is required to provide a genuine mechanical connection between the paint applications. If you don’t rough up the surfaces adequately, your paint job may appear excellent when you walk away from it, but it will begin to reveal all sorts of flaws in only a few years. You may be tempted to immediately start painting, especially if you’re using oil-based paint, because oil paint wets the last layer so thoroughly that it adheres nicely initially and looks beautiful. However, for a long-lasting paint job that will assure pleased, repeat clients, undertake the sanding work.
Use medium-grit paper to resurface worn wood. Sand with fine-grit paper again in places where you’ll use glossy or semi-gloss paint, such as door and window trim. Sanding is a crucial stage in any paint job, so make sure to go over all the current paint ultimately to produce a rough surface suitable for the new paint.
Fill Gaps, Repair Holes, and Replace Wood Rot
After you’ve finished sanding, replace any siding or trim that you can’t preserve. Use epoxy to repair or replace deteriorating wood. Use an external caulk gun to fill gaps around doors, windows, and trim. Because primer protects wood, you may wish to prime it first.
Prime the Walls
Priming also aids in the adhesion of fresh paint to previously painted surfaces. Prime any spots where old paint has already been stripped off, and also prime the entire home to produce a unified paint job that looks nice all around.
Priming is essential when using latex paint to paint over an oil-based paint-covered surface. Use an exterior latex primer or an oil-based primer suggested for repainted external surfaces, depending on your paint choice.
Select a light-colored primer or one that complements the paint color you intend to use. Priming becomes much more critical if you consider changing the house’s color. After priming, do not leave any primed surfaces unpainted.
It’s Painting Time!
It’s now time to throw the spotlight on your property:
Cover your mailbox, lighting fixtures, doors, and trim with plastic sheeting and painter’s tape before painting.
Fill your sprayer with your choice color of eggshell latex or flat paint.
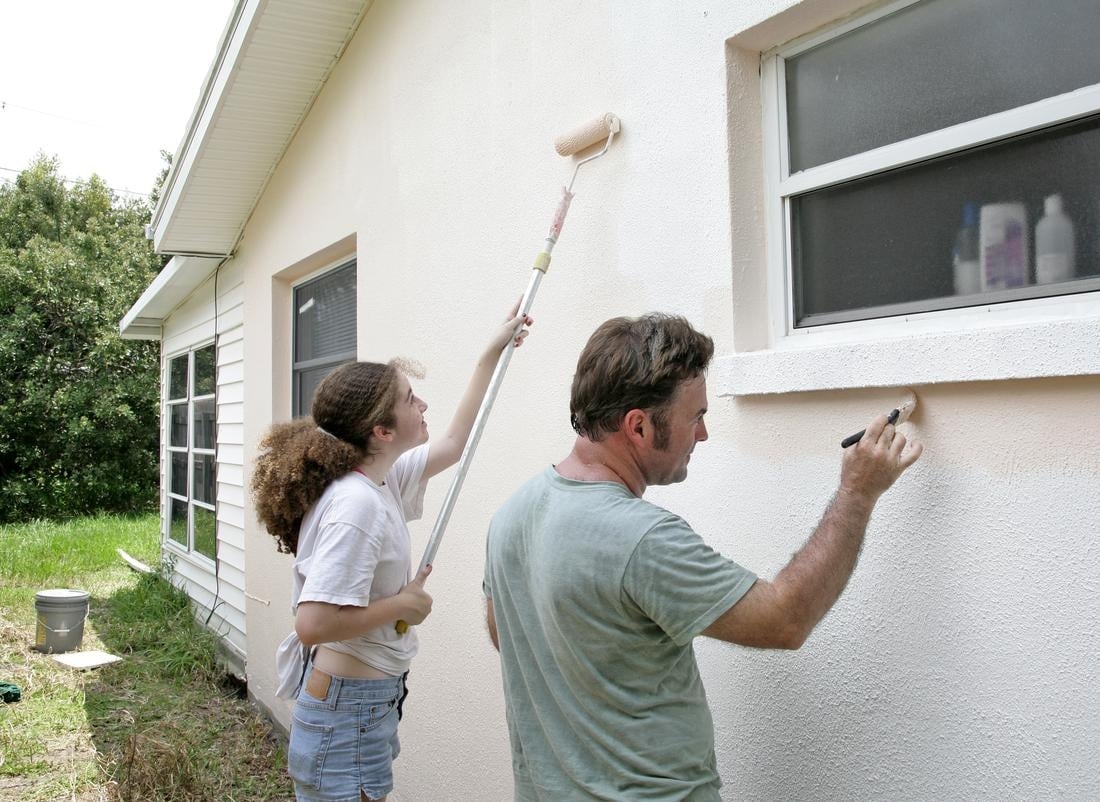
Working from top to bottom, apply one or two applications to the house as needed.
Using two painters and a backrolling method will decrease your time in half. One person sprays the home as another smooths down the sprayed paint with a roller.
When your trim is ready to be painted, remove the plastic sheeting covering it. Choose a semi-gloss accent trim color for a classy effect.
Consider Hiring Professionals
Exterior painting is a huge investment that can make or break the look of your home. By entrusting the professionals at Enrich Construction, you can ensure that every step of the painting process will be handled with care and precision. We’ll work with you to choose the perfect color palette for your home and prepare it for a flawless paint job. So reach out to us and get started on your dream exterior!
A bathroom backsplash protects your walls while also adding flair to them. Our top bathroom backsplash ideas can help you pick a material that matches your taste and budget, whether traditional subway tile, rustic wood planks, or crazy patterned wallpaper.
A backsplash is not only used in the kitchen. For example, a backsplash protects the wall behind the sink from water damage while also adding aesthetic appeal to the bathroom space.
Eleven fantastic bathroom backsplash designs inspire you, ranging from bold to conventional, colorful to neutral.
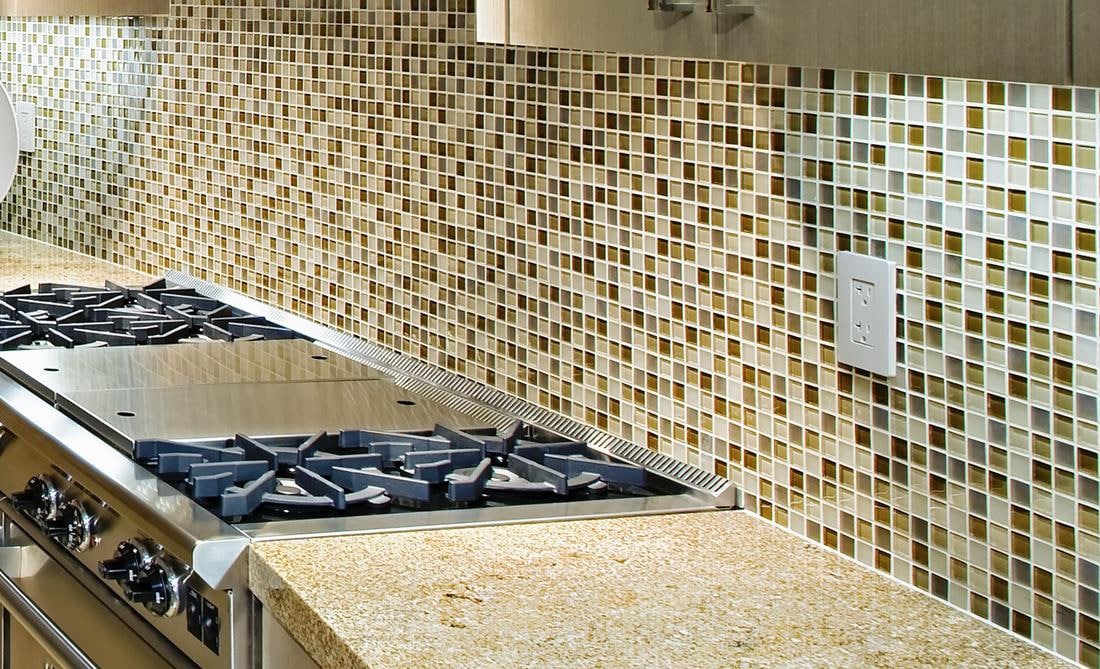
1. Backsplash with Mosaic Tile
Backsplashes are an excellent location for multicolored mosaic tiles. Mosaic tiles are available in huge sheets, making them an easy DIY for adding visual appeal. Choose a color palette or stick to a single hue, such as a deep blue that looks great with a natural wood countertop.
2. A backsplash of Subway Tiles
Put a contemporary spin on a traditional subway tile bathroom backsplash. Instead of the standard running bond design, consider arranging the rectangular tiles in a unique pattern, such as a herringbone or vertical arrangement. Subway tiles are piled vertically and contrasted with black grout for a modern aesthetic in this bathroom’s backsplash.
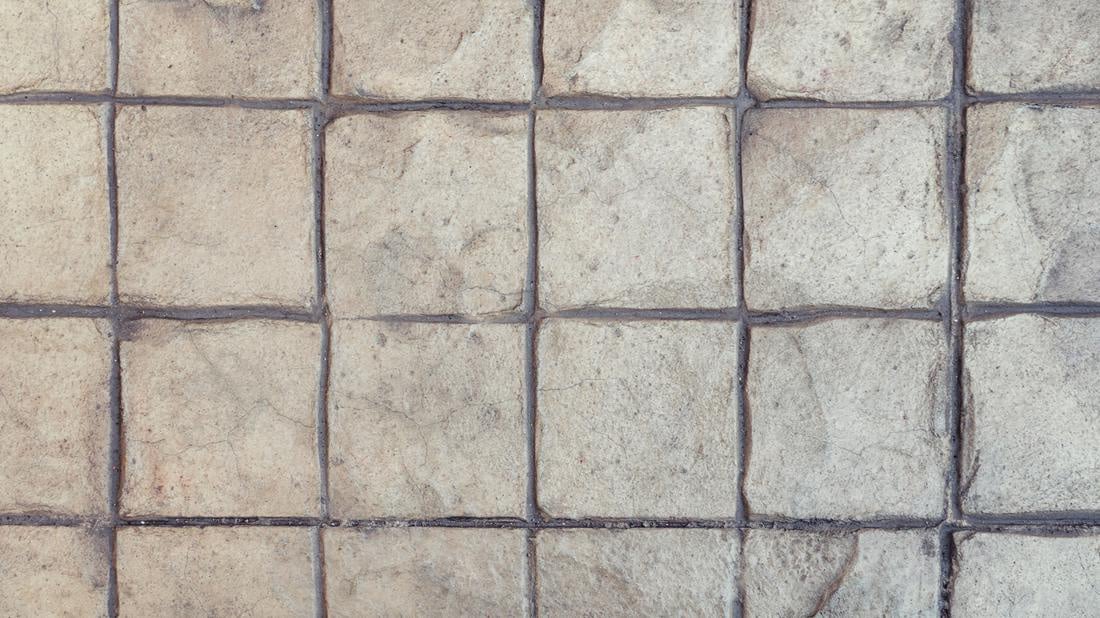
3. Backsplash Painting
Try a two-tone treatment on the wall behind the sink for a low-cost bathroom backsplash design. This look gives the appearance of a backsplash without the expense of tile installation. A dark-gray paint tone that complements the slate floor tiles runs partway up the wall in this neutral bathroom to create a feeling of architecture.
4. Backsplash with Soothing Ocean Colors
Blues and greens are relaxing colors, so include them in your bathroom décor. For example, consider shimmering glass tiles in bright blues and greens for a bathroom backsplash that combines well with white.
5. Backsplash with Decorative Tiles
For a bold bathroom backsplash, go with a graphic tile pattern. Patterned black-and-white tiles extend to the ceiling, providing a striking focal point along the vanity wall. In addition, the ornamental tile designs mixed and matched provide texture and complexity to the bathroom backsplash.
Blending a variety of tile shapes and textures may provide interest to a bathroom backsplash. This primary bathroom’s harsh white subway tile contrasts nicely with the black hexagon mosaic tiles. The low-cost tiles continue onto the floor, creating a low-cost vintage geometric impression.
6. Backsplash with herringbone pattern
Horizontal painted wood planks are a low-cost but eye-catching bathroom backsplash option. A shiplap wall finish adds country charm to this lovely blue bathroom. Give the rustic aesthetic a modern makeover.
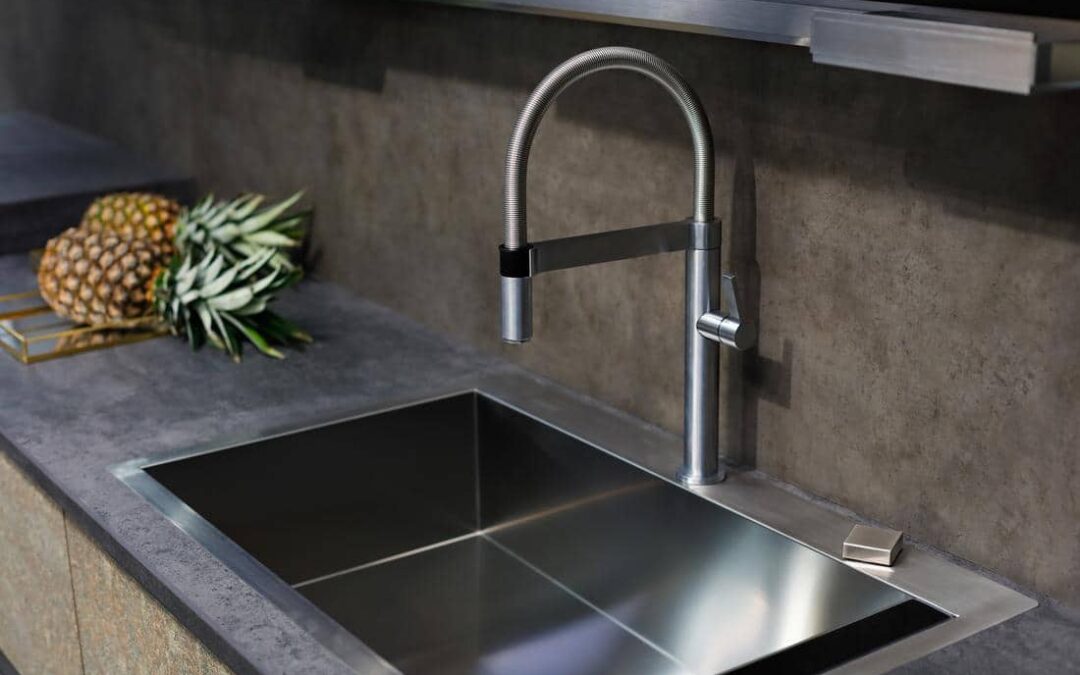
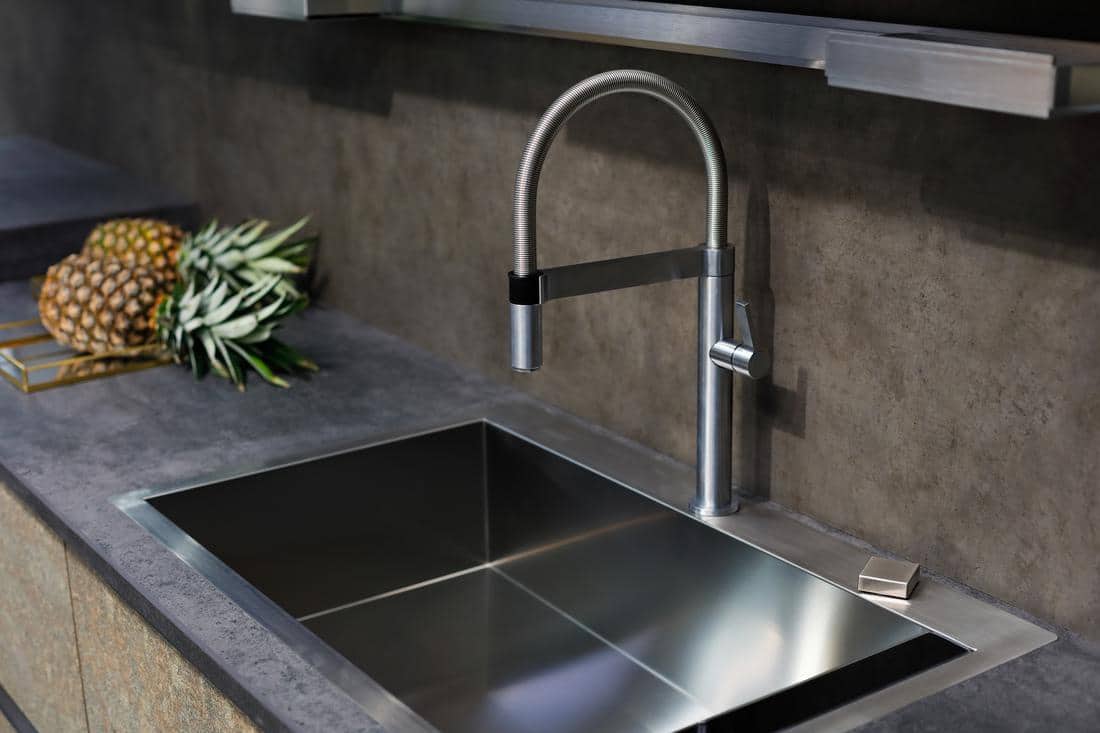
7. Backsplash for an Industry Look
A concrete-inspired hand-plastered backsplash complements a contemporary vanity. This bespoke effect is achieved by troweling gray plaster; a stainless steel strip beneath the faucets protects against splashes. Combine the material with touches of green for a peaceful blend of earthy and industrial.
8. Waterproof Wallpaper Backsplash
A wallpapered accent wall may liven up a powder room. This geometric coral pattern adds a splash of color to the modest bathroom. Choose vinyl-coated wallpaper, which can handle wetness better, and spend a little more money for the best protection.
9. Backsplash made with Coins.
The use of round penny tiles is not limited to the bathroom floor. Bring them up to the backsplash of your bathroom vanity for a creative take on tradition. Choose a cream-colored tile to warm up a small bathroom and complement an earthy color scheme.
10. Backsplash Ideas in Neutral Tones
Neutral tile designs are popular, but you don’t have to go big to participate. Instead, try a geometric bathroom backsplash in neutral tones for an on-trend style that will last for years. This style would also look great as a tile border around a mirror.
11. Backsplashes can be mixed and matched.
Natural stone trim complements white subway tile. Thin moldings split tile lines and highlight the transition between the backsplash and the beige wall. Honey-colored grout complements the space’s neutral color palette while warming up the typical bathroom backsplash.
Backsplash Questions Often Asked
Should I install a bathroom backsplash?
A backsplash is still suggested in bathrooms, while it is feasible to go without one in some cases. For example, if your sink counter does not butt up against the wall (a pedestal sink, for example), you need a backsplash for cosmetic reasons.
What is the lifespan of peel and stick backsplashes?
Water-resistant vinyl with realistic-looking 3D designs, hardened silica gel tiles (that appear and feel like a textured tile surface), and even genuine mosaic tiles (produced from thin natural materials like mother-of-pearl) are all used to make peel-and-stick backsplashes. These tiles are available in various assorted styles that nearly mimic their natural tile counterparts. Moreover, they’re entirely do-it-yourself: peel off the backing and stick the backsplash to the wall. The most excellent peel-and-stick backsplash is also extremely low maintenance, requiring only a wet towel to clean.
Should my backsplash match the color of my countertop?
If you have light cabinets and countertops, pick a dark backsplash to add depth to the kitchen. Likewise, a light backsplash helps brighten a kitchen with dark cabinets or counters.
Is a Backsplash Required Behind A Bathroom Sink?
You don’t need a backsplash behind your sink, but it’s a good idea to incorporate one into your bathroom décor.
Can I do my backsplash installation?
To build a backsplash, you don’t have to be an expert. With sufficient preparation, even beginner DIYers can master the basics of tiling a tile backsplash. The backsplash collects any spray from the faucet as you wash your hands or brush your teeth. It protects the wallboard from water damage.
Which one is ideal for a backsplash?
A multitude of factors influences the finest backsplash for your kitchen makeover. Ceramic is often the ideal tile for kitchen backsplash if you want a classic, conventional aesthetic. If you want to add a modern, creative edge, mix and match peel-and-stick tiling or use chalkboard paint to show your distinct style.
While price is frequently a decisive factor, bear in mind that upfront pricing can be deceiving, so study installation and maintenance expenses. In addition, consider the material’s lifespan, ease of cleaning, and how it will contribute to the kitchen’s overall appearance.
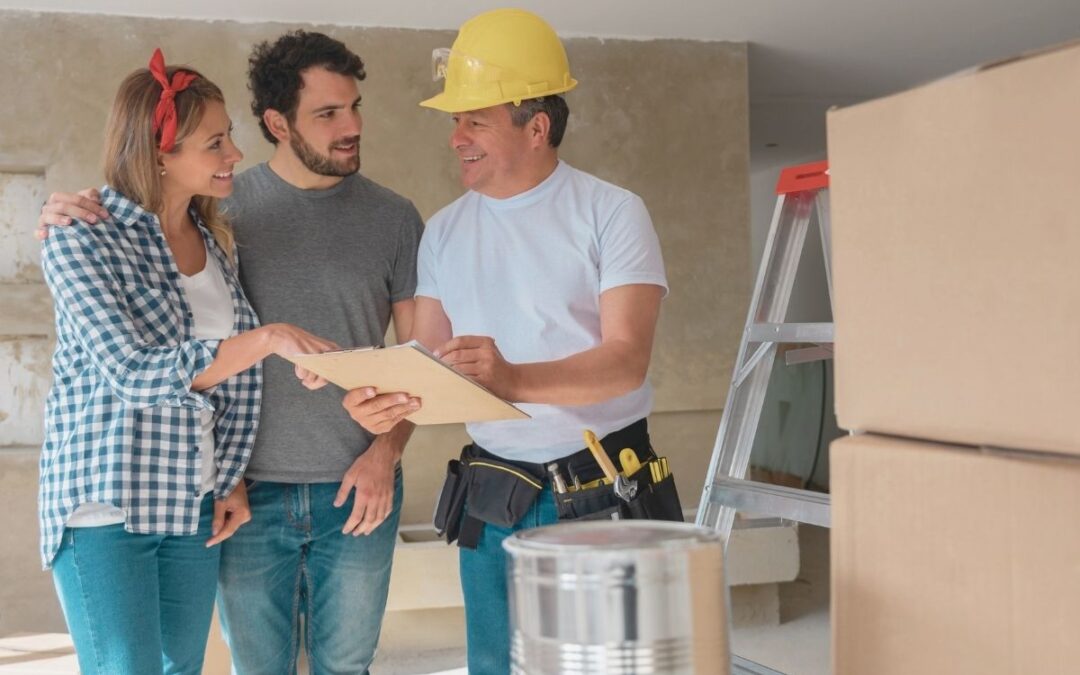
Hiring a contractor is an important decision, and EnRich Construction is here to make sure you’re asking the right questions. A remodeling contractor should be a team you trust, a team with experience and knowledge, and a team with licenses and insurance. As you’re beginning your remodeling process, start asking the right questions. Not sure which questions to ask? Keep reading for what to ask your remodeling contractor before the project begins.
10 Questions to Ask Your Remodeling Contractor
1. Do you have a license for this type of work?
The first and foremost question to ask a contractor is if they have a license for the type of work you’re in need of. Construction is an industry that really depends and relies heavily on licenses.
Once they’ve answered this question, ask to see a copy of said license, and check with the proper authorities to make sure the license is up to date.
2. What kinds of insurance do you have?
Another pertinent question to ask a potential remodeling contractor is, “What kind of insurance do you have?”
General liability insurance is a must because this insurance protects your property in the event of a mishap or accident. Many things can go wrong during a construction project, so with the proper types of insurance, you can be at ease during the process. Worker’s compensation is another insurance type to ask about, and this shields you from liability if someone happens to get injured on your property while remodeling.
3. In the last few years, how many building permits have you obtained in my area as a remodeling contractor?
Making sure the remodeling contractor is well-versed in local building codes and the permit processes in the community is critical. Hiring a contractor who may not be familiar with the area or town may lead to broken regulations.
4. What is the project’s expected timeline?
Timelines are absolutely essential to discuss. If you have a deadline already in mind, make sure you ask your contractor right away what their expected timeline is. A follow-up question could be, “How many other projects are you currently working on?”
Communication is always key, and open timeline discussions will ensure both parties are on the same page.
5. How should we contact you?
Knowing which communication method a remodeling contractor prefers will save you time. And, to be on the same page with how to communicate during the remodeling process will give you peace of mind. So, make sure to ask potential contractors if they prefer text, email, or phone calls to keep in touch.
6. Will you use subcontractors to complete the work?
Depending on the type of remodeling project you’re hiring for, it is important to ask if the remodeling contractor will be outsourcing any work they are not able to do themselves. This may include plumbers, electricians, or painters. If the contractor is hiring out, make sure you know all the names of the other workers. Take the time to check on credentials and insurance.
7. What does the warranty and the payment schedule look like?
A written warranty agreement is a guarantee of what is covered by build and how long the build is covered for. Inquire about a one-year or two-year warranty, and EnRich Construction recommends a 2-year warranty agreement.
A payment schedule is another critical component to hiring the appropriate remodeling contractor for your project. Just like with timelines, being on the same page with payment is essential to a successful agreement. Discuss payment amounts, terms, deliverables, and the payment due dates.
8. Do you anticipate any difficulties with this project?
Asking about difficulties or anticipated challenges upfront will save you from some issues throughout the project. Remodeling projects are not always straightforward, so ensuring open communication from the start will also prepare you for any cost or timeline changes.
9. Will you obtain all necessary building permits and set up inspections?
We mentioned building permits prior, but make sure to ask your remodeling contractor if they are going to obtain all the necessary permits before starting the project. Oftentimes, approval from the HOA or the city is required, and any remodels that alter your home structure will require an approval form.
Inspections are key throughout a construction process. From checking on the plan and specifications to inspecting compliance standards, inquire about setting up inspections before the project gets started.
10. Describe management and a typical workday for your remodeling team.
After all the logistical questions have been asked, remember to also inquire about how the project will be managed and what the day-to-day will entail. Asking your remodeling contractor how often they will be on-site, and if they happen to not be there, who the on-site project manager will be is essential to the communication between the two parties.
When you choose a contracting team, having the peace of mind knowing someone is monitoring all the stages of the renovation will guarantee a successful remodel.
Furthermore, inquiring about a typical work day will give you an idea of the work schedule, work hours, and the organization of the remodeling team you’re hiring.
EnRich Construction’s Last Thoughts on Hiring a Remodeling Contractor
Hiring a remodeling contractor is an important decision, and we hope the above questions help you find the best team for your project. Maximize your remodeling process with the help of EnRich Construction. We make the remodeling process simple, easy, and stress-free, with satisfaction guaranteed. We have the experience you’re looking for in a remodeling contractor, and we have built a team filled with professionals who specialize in every step of the construction process.
If you’re getting ready to start a remodeling project and on the hunt for the best remodeling contractor in Missouri, contact EnRich Construction today! Let’s discuss the licenses, insurance, building permits, and how to make your vision come to life.